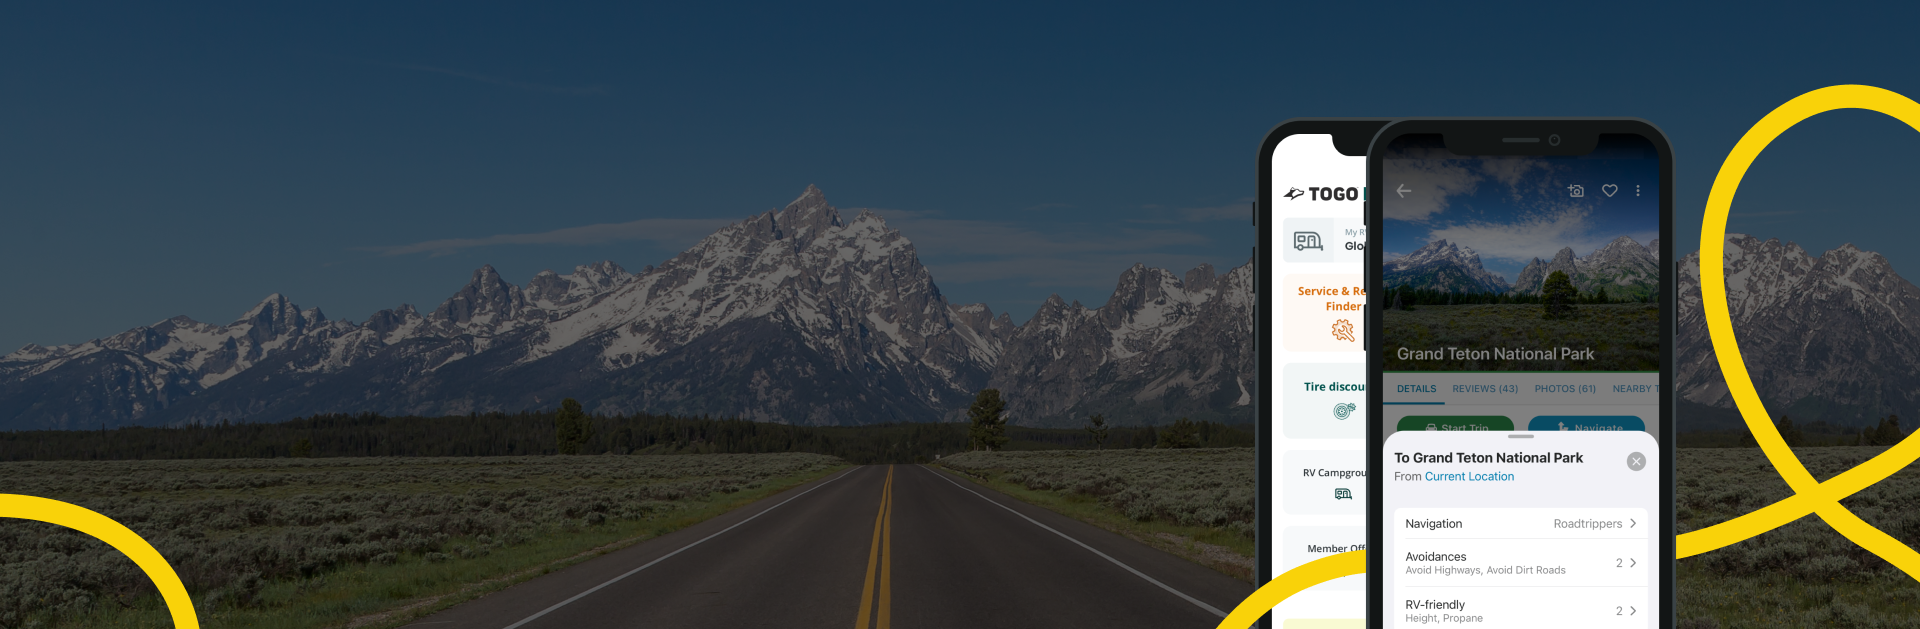

Roadtrippers now contains your favorite Togo RV features!
Roadtrippers has become your all-in-one app for RV Trip Planning by natively integrating your favorite features from Togo RV and Overnight RV Parking. With our latest update, you can plan your entire road trip, find an overnight spot, and manage your RV all in Roadtrippers.

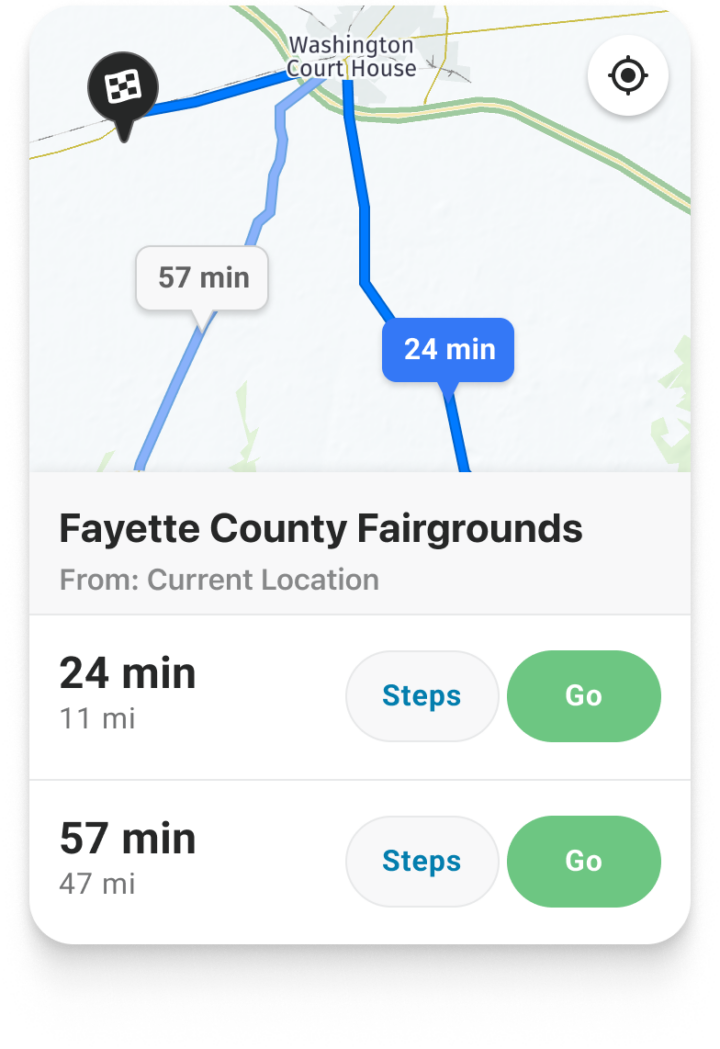
RV-friendly GPS
Our RV GPS navigation give you real-time turn-by-turn directions customized for your RV, including low overhead clearance and propane restriction avoidance. Just select a destination, add your vehicle, and hit the road with confidence.
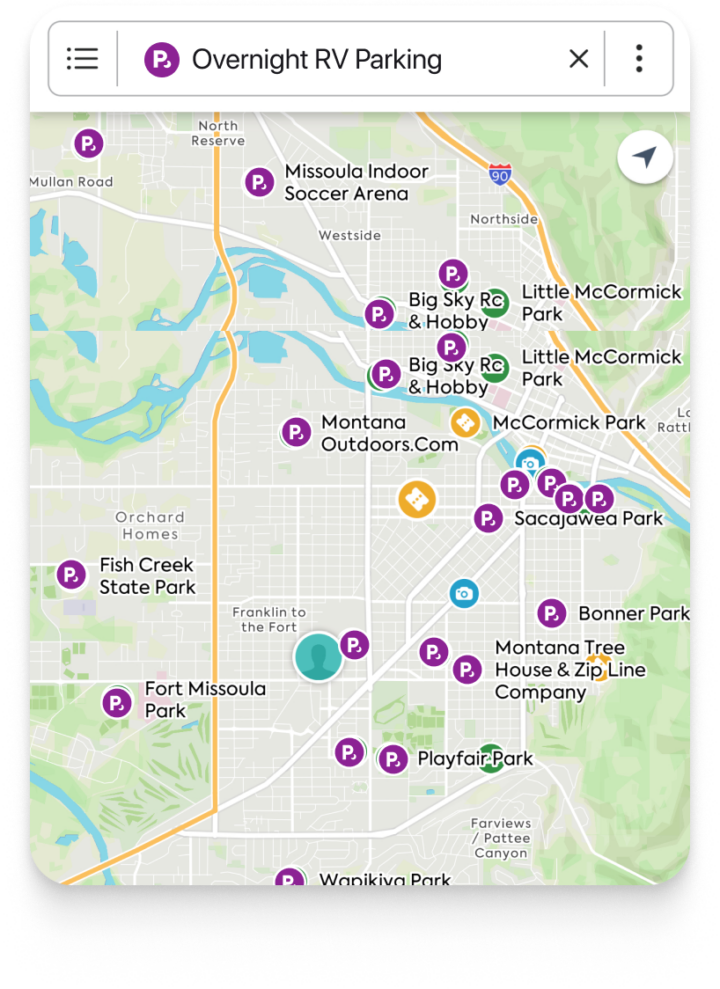
Overnight RV Parking
Save money by finding over 16,000 free places to park your RV on your way to your destination. Get access to the largest, most accurate, and most authoritative database of free overnight RV parking locations in the US and Canada.

Member Deals
Hit the road with exclusive savings on travel gear, campground bookings, RV rentals, and more from our partners.
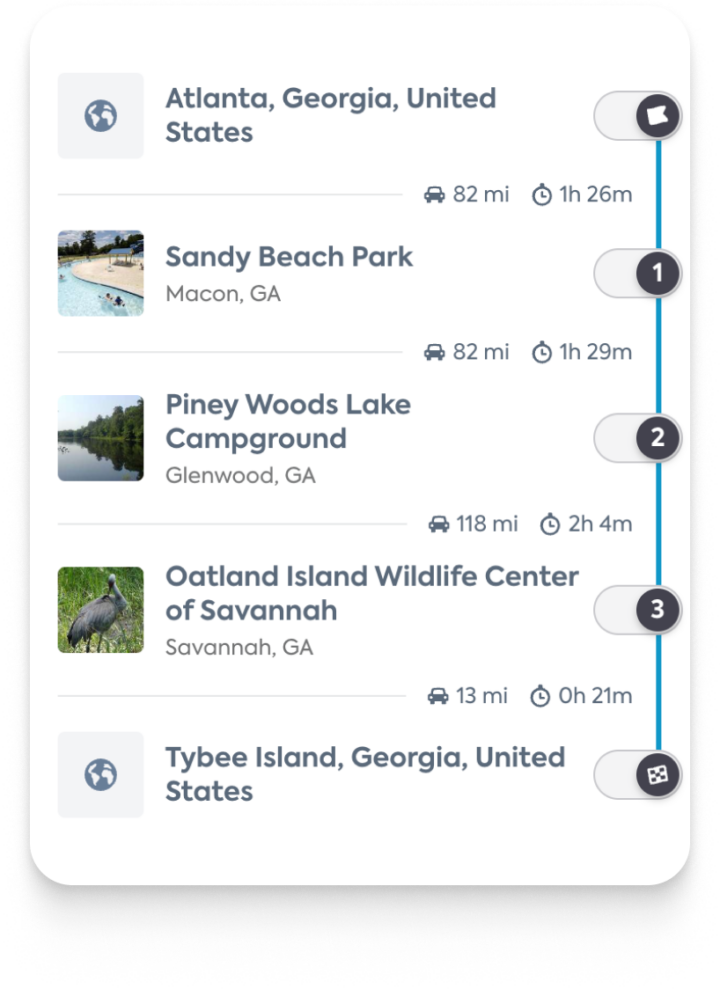
Trip Planning
Spend less time stressing and more time enjoying your trip! Roadtrippers helps you build a route and daily itinerary that is customized for your RV. Add up to 150 stops to your route, including gas stations, campgrounds, attractions, hiking trails, and extraordinary places.

Trip Collaboration
Bring your travel companions along. Collaborate on your stops in real time, and build better journeys with a little help from your friends.
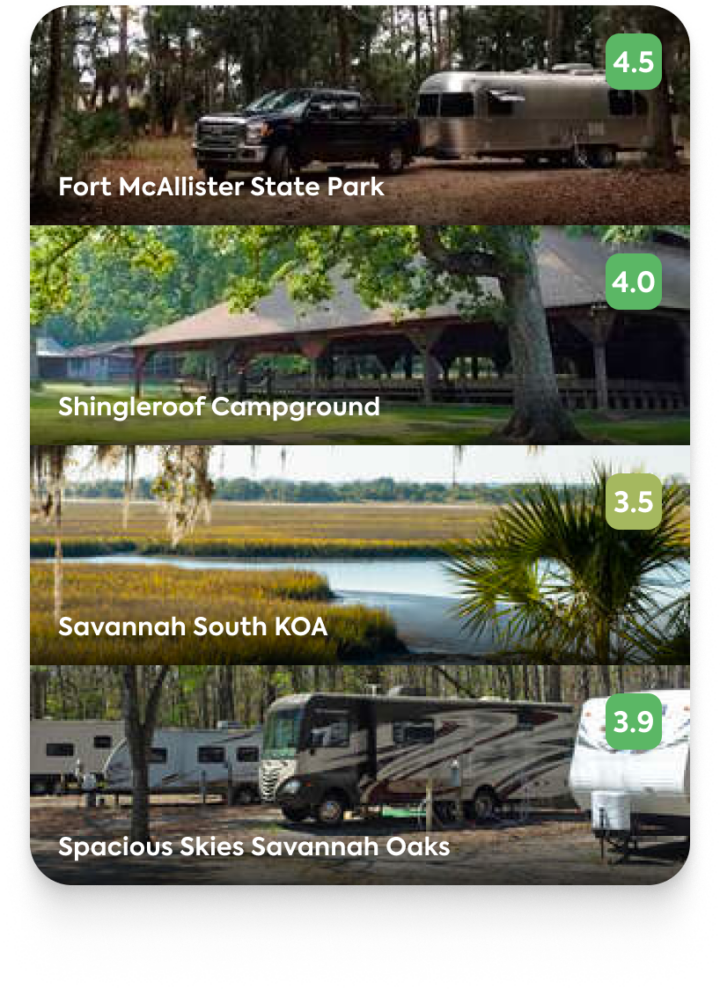
RV Parks & Camping
Discover the best RV parks and campgrounds near your route. With its Campendium integration, Roadtrippers Premium includes access to over 50,000 campgrounds and RV Parks that you can add to your route with one click.
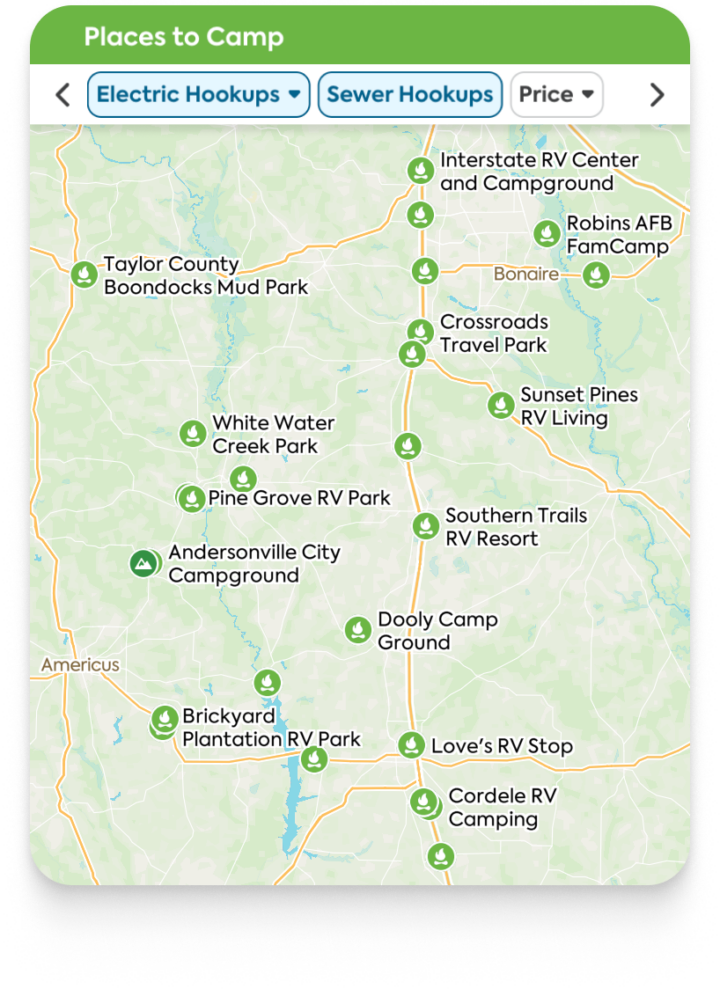
RV Hookups
If you’re in need of water, sewer, or charging connections on your trip, Roadtrippers has you covered with hookup availability across campgrounds, RV parks, and gas stations.
What RVers are saying
Try Roadtrippers Premium free for 7 days
Choose your membership level, and try out all the great features of Premium free for 7 days!

Scenic routes strongly encouraged.
- 3 saved trips
- 20 stops per trip
- Custom map styles
- Trip exports

Extraordinary adventures start here.
- 5 saved trips
- 50 stops per trip
- Everything in Basic
- No ads
- Trip collaboration

Get the most out of your road trips.
- Roadtrippers Autopilot™
- Unlimited trips
- 150 stops per trip
- Everything in Pro
- RV-friendly tools
- Member deals
- And more

Sign Up for a Free Trial
Test drive the best features of Roadtrippers Premium for free! Eligible users will get exclusive access to all the tools needed to plan the perfect road trip.
Create a Roadtrippers account to start your 7-day free trial.
Sign upAlready have a Roadtrippers account?
We need your email address
Before we can sign you up for Roadtrippers, we need your email address. Click the button below to go to your profile.
Plan your next adventure with a Roadtrippers membership
Due after 7-day free trial
Thank you for signing up for a Roadtrippers Subscription
Get started planning your next trip now!

Good news... you already have a Roadtrippers membership!
Thanks for being one of our most dedicated users.
Why adventure seekers love Roadtrippers

"Tears of joy"
“After 5 days of using three maps and five different apps, I found Roadtrippers. I was telling my boyfriend as we sat in the RV and started crying as I described it to him. Happy days.”
Olivia T.

"Absolutely love this app"
"If you go on even one road trip a year it’s worth it. I use it to find new and unusual stuff in my area… LOVE IT!”
Lindsey L.

"Makes planning fun"
“I’m planning a 60-day road trip and this app makes it so much fun and far less work! I couldn’t imagine trying to plan a trip without it now.”
David M.

"Discovered new things"
"Fantastic! Really useful with road trips and with finding things in my city I didn't know existed. Seriously, I recommend it to everyone, I love it!"
Nick R.